I have one reason to Jailbreak the iPhone and that is QIK which I use a lot on the Almerimar Life Blog. There are other applications that are ‘nice to have’ but QIK is the only ‘must have’ applicatiuon for me at the moment. I have unlocked my iPhones in the past so that I could use them when abroad with a different SIM card in, but I travel so infrequently now that I tend not to worry about changing the SIM card.
At the moment the Jailbreak for 3.0 is available but the unlock is still waiting on UltraSn0w which will be released on Cydia soon, so for now I was more than happy to Jailbreak the iPhone. Again very impressed with the speed of the iPhone Development Team!
So for those wanting to Jailbreak your first generation iPhone, iPhone 3G or iPod Touch here is a step by step guide.
1. Download Pwnage Tool 3.0 For Mac and open.

2. Connect your device and select it from the three options.

3.Select the .ipsw restore file. Just click on the one you want to use (generally you will only get the one option!)

4. Confirm you want to place the file on your desktop
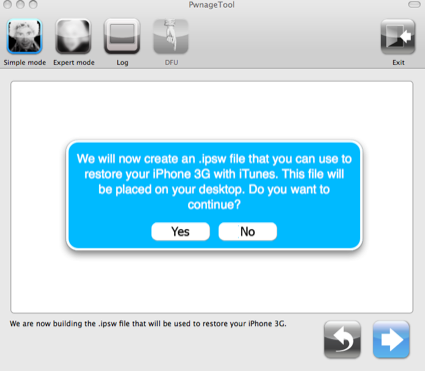
5. Confirm that you would normally activate iPhone through iTunes (if that is the case obviously!)

6. It will then show that it is Building the IPSW file. Your Mac will ask you to enter your password during this process which takes about 5 minutes.

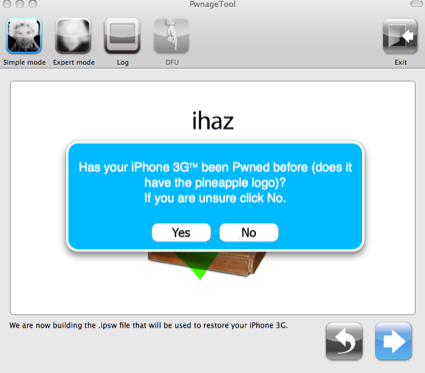
7. You will then be asked if you have Pwned your iPhone before. Even though I had I always say no.
8. You now have to turn of your iPhone and enter DFU Mode. This will require you to hold the power and home button for a while and then the power button. Just follow the instructions on the screen!!
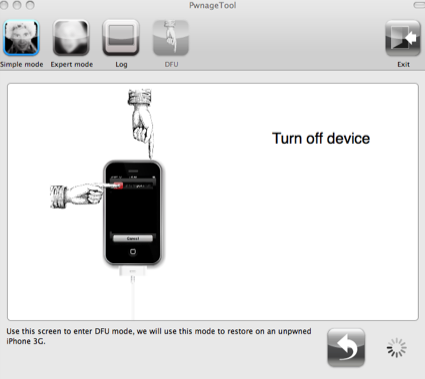
9. Once in DFU mode you need to close the Pwnage Tool application, and start iTunes and restore the custom firmware bundle that was placed on the desktop earlier.
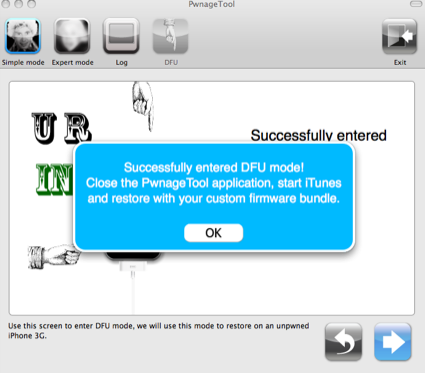
10. Don’t Panic! You will see this message. Select OK and then hold down the alt key on your Mac and click on Restore! You will then see a few ‘installing software’ messages, your iPhone screen will go grey and then you will see the infamous pineapple show up on the screen briefly before the Apple logo and the installation bar at the bottom. This will take 5-10 minutes so be patient!

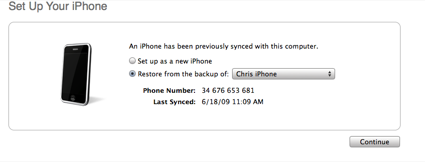
11. You will see the Pineapple appear again, and the phone will say that it has been restored to factory settings. You have to reactivate the phone as normal, then it will say the iPhone needs to be set up. I did a quick check on the iPhone at this stage to make sure that Cydia was installed as this confirms it is jailbroken (it was of course) and then restored from the back up. Again it goes through the restore process and starts up with the welcome site of the pineapple! Followed by the Appple logo and progress bar. It synced the iPhone to reinstall all the applications etc (may take some time if you have a lot of applications installed), then I entered the SIM unlock PIN and bingo!!!

iPhone Jailbreak 3.0 Completed!
As for installing QIK then all that requires is that you open Cydia on the iPhone. You will have to chose what level of user you are, and once in Cydia there will probably be an upgrade. I selected to upgrade everything. Once that was doen did a search for QIK and installed it.
Please read the iPhone Development Team Blog before you try and Jailbreak your iPhone!
This is the version of PwnageTool 3.0 that I used. You are welcome to download and use it BUT please do so at your own risk etc etc!!! Mac Only Version

Pingback: Saturday In Almerimar: A Mixed Bag! | AlmerimarLife - Online Blog & Community For Expats In Spain